I chose three fabrics to make this block according to the guild's directions for the September Block, the Double 4 Patch. I used a fat quarter of blue and a fat quarter of green. I used a half yard of red that I found in my stash. (A caution about reds, always check for color fastness. I always wash my red fabrics before I use them.)

Cut one 3.5 inch strip of red, blue and green. I stacked my green and blue fat quarters together and cut the strip of these two fabrics at the same time.

.jpg)
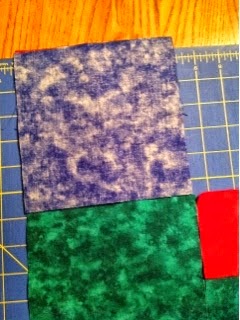
Cut the 6.5 inch blue and green squares now since the fabrics are stacked together.

Cut a 6.5 inch strip. Open the strip to a single layer and then cut the square.

Then I cut a 3.5 strip of red.

I then stacked the three fabric strips together and cut two 3.5 inch squares from the stacked fabrics.


Since there were two layers of the red, I cut the four required squares as I cut two blue and two green squares.
Everything is now cut and you can lay out your square.

All pieces laid out and ready to sew.
Flip the right side piece of the 4 patch part of the block to the left side piece of the top row and do the same with the second row of the four patch.
Repeat the process with the second lower right 4 patch.

Bring stacked pieces to your sewing machine and feed the pairs in, one pair at a time sewing them together and not cutting the threads between the two pairs. Repeat with the second 4 patch.


Open and press. (I finger pressed during this tutorial, but I would have gotten a sharper crease had I used an iron)
Match the two rows of the 4 patch together, lock seams together in the center and sew the 4 patch together.

Oh, the navy and yellow 4 patch is for another project and is a "leader and ender" that goes between my main sewing project so that I never have to clip threads between blocks, 4 patches or whatever I am sewing for the main project. More on that in another post or visit Bonnie Hunter's blog at Quiltville.com for more info on this procedure.
Getting ready to sew the block together
.jpg)
Match the 4 patch and the 6.5 inch square in each row, by flipping the square to the 4 patch in the top row and by flipping the 4 patch to the 6.5 inch square in the second row. Sew the matched pairs together.


Match the two rows together and sew. I used a pin so I could take the picture, but I rarely pin at this step.
Voila! A finished block! May I present the Double 4 Patch!

Thanks for visiting and reading through this tutorial. Comment or e-mail me if you have any questions!


